
How Much Does Radiant Barrier Installation Cost in Lancaster, CA?
Radiant barrier installation in Lancaster, CA typically costs between $1,400 and $3,200 for a standard single-story home, with most homeowners landing around $1,800 to $2,400 when the attic is already accessible and in reasonable condition. The wide range exists because attic square footage, existing insulation depth, and whether any air sealing or cleaning work is needed before installation all pull the number in different directions.
Lancaster’s climate makes radiant barrier one of the highest-return insulation upgrades available locally. We’re talking about a high desert environment where summer attic temperatures regularly exceed 150°F – sometimes hitting 160°F on west-facing roof planes – and that stored heat radiates down through your ceiling long after the sun sets. A properly installed radiant barrier cuts that radiant heat load by 25% to 40%, which means your AC doesn’t have to work as hard to hold 74°F in the living room at 10 PM.
Radiant Barrier Installation Cost Breakdown (2026)
The table below reflects actual installed pricing in the Lancaster market as of 2026. These are not national averages pulled from a content database – they’re the numbers we work with daily in the Antelope Valley.
| Service Item | Typical Price Range | Notes |
|---|---|---|
| Radiant barrier foil – small home (under 1,200 sq ft attic) | $1,400 – $1,800 | Standard rafter-staple application, accessible attic |
| Radiant barrier foil – mid-size home (1,200-2,000 sq ft attic) | $1,800 – $2,400 | Most Lancaster tract homes fall here |
| Radiant barrier foil – large home (2,000-3,000 sq ft attic) | $2,400 – $3,200 | Includes ridge-to-eave full coverage |
| Attic air sealing (add-on, recommended before install) | $400 – $900 | Seals top plates, penetrations, recessed lights |
| Attic cleaning and prep (if needed) | $500 – $1,400 | Required when rodent debris or deteriorated insulation is present |
| Blown-in insulation top-up (often paired) | $800 – $1,800 | Added when existing insulation is below R-38 |
| Home energy audit (standalone diagnostic) | $200 – $400 | Identifies whether radiant barrier is the right first move |
What the Total Investment Usually Looks Like
For a typical 1,600 square foot single-story Lancaster home built between 1985 and 2005 – the kind of stucco tract house you’ll find throughout west Lancaster and the Quartz Hill area – the most common project total lands between $2,200 and $2,900. That number usually includes the radiant barrier foil, basic attic air sealing around the most common penetrations (top plates, recessed light cans, HVAC boot connections), and any minor prep work needed to get a clean surface for stapling.
Where costs climb is when the attic needs remediation first. We see this regularly in older Lancaster homes near Avenue J and around the 10th Street West corridor – attics with 15-year-old blown fiberglass that’s settled to 3 or 4 inches, sometimes contaminated with rodent droppings. Installing radiant barrier over a compromised attic floor doesn’t fix anything – it just traps the problem under a reflective layer. That’s why we audit before we install. In those cases, full project cost can reach $3,800 to $4,500 when cleaning, rodent proofing, blown-in replacement, air sealing, and radiant barrier all come together in one visit.
The upside: you’re solving the whole problem in one project rather than calling three different contractors over two years.
What Affects Radiant Barrier Installation Pricing in Lancaster
Six factors move the number more than anything else in Lancaster specifically. These aren’t generic cost variables – they reflect what we actually see when we go up into attics across the Antelope Valley.
- Attic square footage and roof pitch. A steeper pitch means less crawlable attic space and more time working at awkward angles. Low-slope roofs common on Lancaster’s flat-lot homes are actually faster to work in, which can keep labor cost closer to the lower end of the range.
- Attic accessibility and obstacle density. HVAC equipment, ductwork runs, and attic storage all slow the installation. Homes in the Antelope Acres area sometimes have attics split by structural elements that require extra material and time to bridge properly. Straightforward open attics go faster and cost less.
- Existing insulation condition. California’s Title 24 energy code doesn’t require you to tear out functional insulation before adding a radiant barrier, but if what’s already there is settled, contaminated, or fire-damaged, it should come out before new material goes in. That’s an honest assessment we give at every estimate, not an upsell.
- Whether air sealing is included. Radiant barrier handles radiant heat – the kind that travels in straight lines from a hot roof to your ceiling. But if your attic is leaking conditioned air through unsealed top plates and can light penetrations, air sealing delivers a faster payback. We often quote both together because they address different heat transfer mechanisms, and doing them separately means two trips up into a 130-degree attic space.
- Foil type and coverage method. Perforated foil is the correct choice for Lancaster’s climate – it allows moisture vapor to pass through rather than trapping it against the roof decking. Non-perforated foil costs marginally less but creates condensation risk during the mild winter months when Lancaster sees some humidity. We only install perforated product in this market. Full rafter-staple coverage (both rafter faces plus the horizontal runs) costs more than partial coverage but delivers measurably better performance in our heat conditions.
- Project timing and access difficulty. Summer installs in Lancaster mean crews working in attics that hit 150°F before 10 AM. We manage scheduling to protect both quality and safety, which means peak-summer booking can run tighter. Off-season projects (October through February) sometimes have more scheduling flexibility, though pricing doesn’t typically fluctuate significantly by season for our team.
Is Radiant Barrier Worth It in Lancaster?
Direct answer: yes, more consistently than almost any other location in California. Lancaster sits at about 2,300 feet elevation in the Mojave Desert – a climate with 108°F summers, minimal cloud cover from June through September, and intense solar radiation that simply does not exist at this intensity in coastal or Bay Area markets. The conditions that make radiant barrier worth debating elsewhere make it a straightforward recommendation here.
The Department of Energy estimates that radiant barriers reduce cooling costs by 5% to 10% in hot climates. In Lancaster’s extreme summer conditions, we see anecdotal reports from homeowners of 12% to 18% cooling cost reductions when radiant barrier is paired with properly sealed attic penetrations and adequate mass insulation below. At Lancaster’s current SCE rate tiers, a 15% reduction in summer cooling costs can translate to $180 to $400 annually on a typical home – not a number you’ll see used in colder markets, because those markets don’t need radiant barrier the way Lancaster does.
Payback period on a standalone radiant barrier install in Lancaster typically runs 4 to 7 years when paired with basic air sealing. When bundled with a blown-in top-up that brings attic mass insulation to R-38 or above, payback compresses further because you’re addressing both radiant and conductive heat transfer in one pass.
When Radiant Barrier Is Not the Right First Move
If your attic already has adequate mass insulation (R-38 or better, in good condition) and you’re still seeing high bills, the culprit is usually duct leakage or air infiltration through top plates – not radiant heat. We’ve walked into Lancaster homes where the homeowner was ready to write a check for radiant barrier on day one, and after looking at duct connections and unsealed penetrations, we redirected the budget toward air sealing and duct work instead. That’s not a popular thing for an insulation contractor to say, but it’s the right call. A home energy audit costs far less than a fix that doesn’t solve the actual problem.
How to Save on Radiant Barrier Installation in Lancaster
There are real ways to reduce your total project cost in Lancaster without cutting corners on the installation. Here’s what actually works:
Bundle services in one project visit
The largest single cost in any attic project is mobilization – getting into the attic and setting up. If radiant barrier, air sealing, and a blown-in top-up all happen on the same day, you pay for one setup, not three. Bundled projects with Prime Insulation regularly come in 10% to 15% cheaper per service than scheduling each separately. Call (661) 545-6966 to get a bundled estimate and see the actual dollar difference.
Check for utility rebates before you commit
Southern California Edison’s Energy Efficiency programs have historically offered rebates for attic insulation upgrades that meet certain R-value thresholds. The rebate structure changes year to year, and 2026 program availability depends on current SCE funding levels. Ask during your estimate – we’ll tell you what’s active and whether your planned scope qualifies. We don’t build rebates into the price we quote; if they’re available, they come off the top after.
Don’t wait for peak summer
Scheduling in late fall or early spring doesn’t always save money directly, but it does mean you’ll have more flexibility in scheduling – especially for larger projects that require multiple service lines on the same day. A project scoped properly in March installs cleaner than one rushed to beat a heat wave in July.
Start with a home energy audit
Spending $200 to $400 on a diagnostic audit before committing to any installation can save you from buying the wrong solution. We’ve had clients in the Palmdale-Lancaster border area who were quoted radiant barrier by another contractor, went through an audit with us, and discovered their primary problem was completely unrelated – duct tape that had dried out and pulled away from flex duct connections, dumping conditioned air directly into the attic cavity. Radiant barrier wouldn’t have touched that problem.
Get a quote that covers the full scope before you approve anything
The most expensive outcome in any attic project is staged work – doing radiant barrier one year, then coming back for air sealing, then coming back again for rodent proofing. Each visit restarts the mobilization cost. Ask for a full-envelope assessment at the first estimate. You don’t have to do everything at once, but knowing the full picture lets you prioritize intelligently.
Free estimates for Lancaster homeowners are available by calling (661) 545-6966. The person who answers is connected to the person who actually shows up.
Radiant Barrier vs. Other Insulation Options in Lancaster
Radiant barrier works on a specific mechanism: it reflects radiant heat (infrared radiation) back toward its source rather than absorbing it and transferring it downward. It does not add R-value. It does not slow conductive heat transfer. That’s an important distinction for Lancaster homeowners comparing their options.
Mass insulation – blown-in fiberglass, blown-in cellulose like GreenFiber, or batt products like Owens Corning or Johns Manville fiberglass batts – slows conductive heat transfer, the kind that moves through the thermal mass of your ceiling assembly hour by hour. Mass insulation and radiant barrier do different jobs and work better together than either does alone.
Spray foam – products like Icynene or Demilec open-cell and closed-cell formulas – can be applied to the underside of the roof deck rather than the attic floor, effectively converting the attic space to conditioned space and eliminating the radiant heat problem from a different angle. This is a more expensive approach (typically $3,500 to $6,000+ in Lancaster) but solves both air sealing and thermal performance in a single material. For homes with HVAC equipment or ductwork in the attic, encapsulated attics via spray foam can deliver performance gains that radiant barrier alone can’t match.
The right answer depends on your home’s specific configuration, your HVAC system placement, your current insulation levels, and your budget. That’s the conversation we have at every estimate – not a default recommendation toward whatever’s easiest to install that week. We carry radiant barrier products alongside every major insulation category because we want to match the solution to the problem, not the other way around.
What the Installation Process Looks Like
Understanding the process helps you know what a proper installation should include – and what corners look like when they’re being cut.
Step 1: Attic assessment before any material touches the space
We go up before we quote. That means checking existing insulation depth and condition, looking for rodent evidence, checking air sealing quality around penetrations, noting roof pitch and obstacle placement, and confirming attic ventilation is adequate. Radiant barrier performance depends on maintaining an air gap between the foil and the roof deck – without that air gap, you lose most of the reflective benefit. If soffit or ridge ventilation is compromised, we note it at assessment.
Step 2: Prep work – clean, seal, then install
If the attic needs cleaning or rodent proofing, that happens first. Laying perforated foil over contaminated insulation creates a situation where the old material continues to off-gas and deteriorate underneath a barrier that now makes it harder to access. Air sealing of top plates and penetrations comes next – before radiant barrier, because access to those areas is cleanest before the foil is in place.
Step 3: Radiant barrier installation
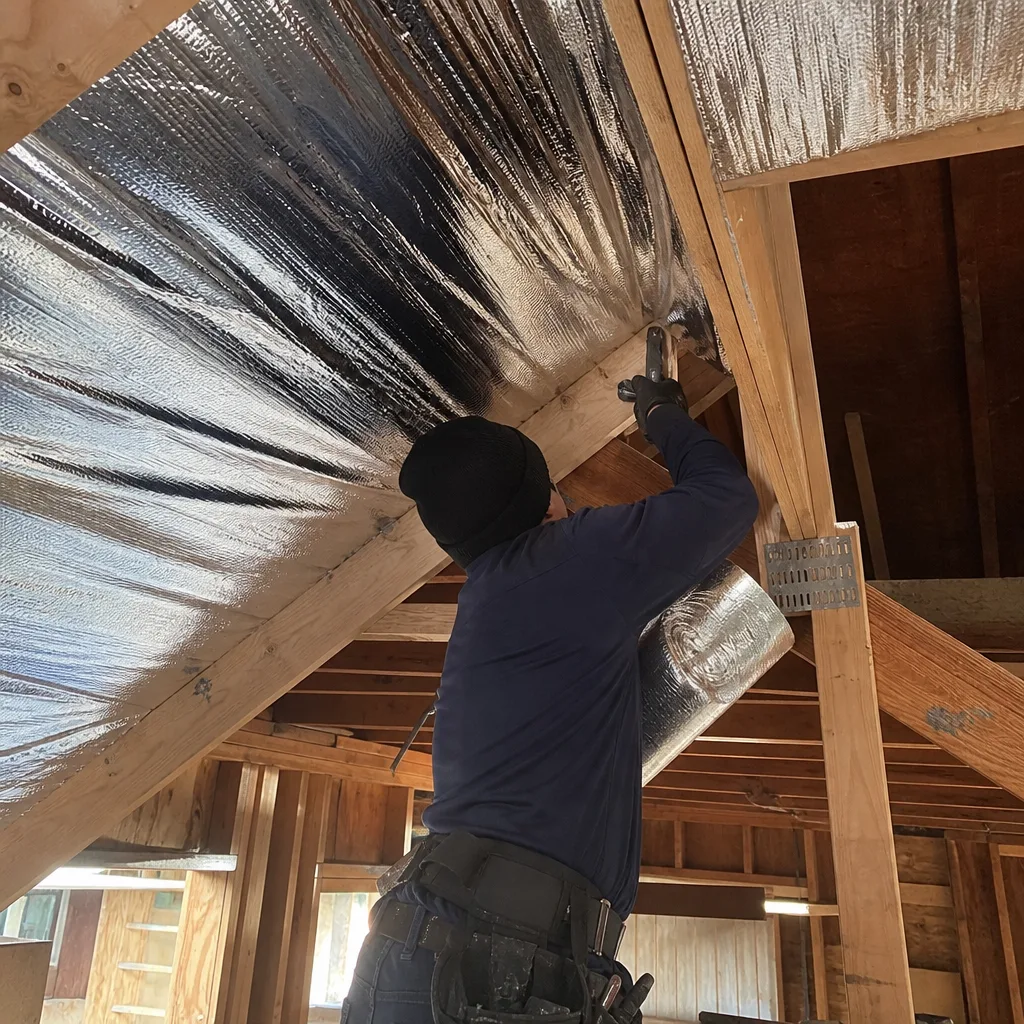
Perforated foil is cut and stapled to the underside of rafters, maintaining a clear air gap from the roof deck. We work ridge-to-eave, overlapping seams, and cut around any existing electrical or HVAC components without compromising coverage. The goal is maximum reflective surface area facing the primary heat source – the roof deck. Partial installations that cover only 60% of the attic area perform measurably worse than full-coverage installs.
Step 4: Final walkthrough and documentation
Before we leave, we document the installation with photos, confirm that attic ventilation pathways are clear, and walk the homeowner through what was done and why. In Lancaster’s permit environment, radiant barrier installation typically does not require a building permit as a standalone project, but we stay current on any Los Angeles County building department updates that could affect this for combined scopes.
FAQs – Radiant Barrier Installation Cost in Lancaster, CA
How much does radiant barrier installation cost in Lancaster, CA?
Radiant barrier installation in Lancaster costs between $1,400 and $3,200 for most single-family homes, with the average project landing around $1,800 to $2,400 for a mid-size home with an accessible attic. Larger homes or projects that include attic cleaning, air sealing, or blown-in insulation alongside the radiant barrier can reach $3,500 to $4,500 for the full scope. Call (661) 545-6966 for a free estimate – we assess the attic before quoting, so the number you get reflects your actual home, not a square-footage formula.
How long does radiant barrier installation take in Lancaster?
A standalone radiant barrier installation on a standard Lancaster home typically takes 3 to 6 hours, with a crew of two. When combined with air sealing and a blown-in top-up, plan for a full day. Larger or more complex attics – especially two-story homes or those with significant equipment in the attic space – can run into a second day for the combined scope. We give you an honest time estimate before we start, not after.
Does radiant barrier really work in Lancaster’s climate?
Yes, and Lancaster is one of the clearest cases in California for radiant barrier effectiveness. With summer roof surface temperatures regularly exceeding 150°F and solar radiation that peaks in late June and July, radiant heat is a primary driver of cooling load in Antelope Valley homes. Studies and field data consistently show 5% to 18% cooling cost reductions in climates similar to Lancaster’s when perforated foil is correctly installed with an adequate air gap. The keyword is correctly – partial coverage or improperly ventilated installs don’t perform the same way.
Is it cheaper to DIY radiant barrier installation?
Material cost for perforated radiant barrier foil runs $0.15 to $0.35 per square foot, so a 1,600 square foot attic is $240 to $560 in foil alone. DIY is physically possible for homeowners comfortable working in confined, extremely hot spaces. The risks are real: working in an attic in Lancaster summer temperatures is genuinely dangerous – heat stroke is a serious concern above 130°F, and that’s where your attic will be from 9 AM to 6 PM June through September. Beyond the safety issue, improperly installed foil that sags, fails to maintain an air gap, or leaves gaps at seams underperforms significantly. Our installed pricing includes proper coverage, correct material, and work done by people who do this regularly in these conditions. The labor portion of the quote is what pays for that.
Can radiant barrier be installed with existing insulation, or does the old insulation need to come out?
Radiant barrier is almost always installed with existing insulation in place – it goes on the rafters above the insulation, not on top of it. You don’t need to remove existing mass insulation to add a radiant barrier, and in most Lancaster homes, leaving functional existing insulation in place is the right call. Where removal is necessary – contaminated insulation, settled material below R-19, or material that has absorbed moisture or rodent waste – we’ll tell you clearly and explain the cost difference. Removing insulation that doesn’t need to come out is extra cost with no benefit; leaving insulation that should come out creates a long-term problem. The assessment tells us which situation you’re in. Call (661) 545-6966 to schedule yours.
Does Lancaster, CA require a permit for radiant barrier installation?
In most cases, a standalone radiant barrier installation in Lancaster does not require a building permit under Los Angeles County building codes. However, if the project includes significant electrical work around attic fixtures, HVAC modifications, or structural work, those components may trigger permit requirements independently. We stay current on LA County building department requirements and will flag anything that needs a permit during the assessment. We don’t skip permits when they’re required – it protects you at resale and during any future insurance claim.
Key Takeaways
- Radiant barrier installation in Lancaster typically costs $1,400 to $3,200, with most homes in the $1,800 to $2,400 range.
- Lancaster’s high desert climate – 108°F summers, intense solar radiation, minimal cloud cover – makes radiant barrier a high-ROI upgrade compared to most California markets.
- Perforated foil is the correct product for Lancaster; non-perforated foil creates condensation risk during winter months.
- Radiant barrier addresses radiant heat only; pairing it with air sealing and adequate mass insulation (R-38 or better) produces the strongest results.
- Bundling radiant barrier with attic air sealing and blown-in in a single project visit reduces total cost compared to scheduling separately.
- SCE rebates may be available for qualifying projects – ask at your estimate.
- A home energy audit before committing to any installation ensures you’re solving the right problem first.
- Free estimates available by calling (661) 545-6966 – the owner assesses and installs, not separate sales and labor teams.
Written by the Owner & Lead Installer at Prime Insulation Lancaster, serving Lancaster, CA and the Antelope Valley. Pricing reflects the Lancaster market as of 2026. Prime Insulation Lancaster offers free estimates – call (661) 545-6966.
What Our Customers Say
"Found and sealed a gap around the chimney chase that was basically an open chimney to the attic."
— Karen Park"Spray foam in the rim joists in the basement. The cold floors above them are gone."
— Michelle Yang"Told me the crawlspace didn't need doing and only the attic did. Half the job, half the money."
— Jodi Mercer